- Why not just use the built-in Excel connector?
- Why can’t I refresh my Excel dataset?
- When is it ok to use the Excel connector?
- Meat and Potatoes
- Words of Warning
- Back to Getting Data
- Test Refreshing
- So, what next?
- So, that’s it?
- Fin
Why not just use the built-in Excel connector?
Excel spreadsheets are still quite widely used in industry and are a popular method of recording and tracking various forms of data. If you are familiar with Power BI Desktop you would be aware that there is a out-of-the-box Excel connector that allows you to easily connect to a Excel spreadsheet. The major issue you’ll experience however is that you won’t be able to refresh your dataset after publishing your report to the Power BI’s online service.
Why can’t I refresh my Excel dataset?
The reason you can’t refresh your dataset, is because the connector is referencing your Excel spreadsheet locally instead of referencing an accessible path by the Power BI service. So for example, that path to the data that the Power BI service sees is something like “C:\user\username\Documents\MyDataset\my_dataset.xlsx”.
When is it ok to use the Excel connector?
So there definitely are scenarios where you would want to use the built-in connector. One might be if you are just simply building a report for local consumption in Power BI Desktop. Perhaps you just want to just do some number or visualization crunching for yourself. Another scenario is if your data is purely static. So if you dataset doesn’t ever change or changes rarely and you are ok with manually publishing the changes every once in a while, then you might lean towards using the built-in connector. However, my suggesting is if you ever think that the dataset will change (even if it’s every fiscal quarter or year) use the method I’m about to lay out with OneDrive.
Meat and Potatoes
Before we jump into how to get started, you will require a few items or licenses.
- An account with OneDrive (see here for more information on M365 licensing)
- An account with access to a Power BI tenant
- An Excel spreadsheet with data (if you want to get some free datasets to play around with, check out Kaggle)
First thing we want to do is fire up Power BI Desktop (download from the Microsoft Store) and sign into our Power BI publishing account (the account you will use to publish to the Power BI service).
Words of Warning
Obviously a report is only as good as the data it references as a source. And, if said source is deleted or moved, it will cause the report refresh to break. I should also mention that if you store this report on a “personal” OneDrive, make sure that account is a service account and not a individual’s account. Why? Well if that person leaves your company or organization, their account is likely to be decommissioned and depending on the tenant policies, that OneDrive might be wiped from existence.
Back to Getting Data
Alright, first thing we want to do is get the URL of our OneDrive Excel spreadsheet. To forumalte the URL, you will need to get your tenant OneDrive address. To get that simply navigate to OneDrive in your browser and copy the URL in your address bar that looks like the following:
https://{TENANT-NAME}-my.sharepoint.com/personal/{USERNAME}
Once you’ve copied that URL, copy to a notepad for save keeping as we will be using part of that URL to make up our connection string in Power BI. To finalize the name of the connection string, you will need to make a note of the folder structure of where you stored your Excel spreadsheet. If you select My Files, note down the folders and perhaps the sub-folders where you have stored your Excel spreadsheet.

In my case (as shown in the screenshot above) my folder structure is “CodeSortsBlog/ExcelBlog”. Be aware, that if your folders or file name have a space in them you will need to show that as “%20” in your URL string. So, lets add our folder and file strings to our main OneDrive URL. I should point out that we will also be appending the “Documents” name to the URL to signify the “My Files” folder. The URL should look something similar to this:
https://{TENANT-NAME}-my.sharepoint.com/personal/{USERNAME}/Documents/CodeSortsBlog/ExcelBlog/my_dataset.xlsx
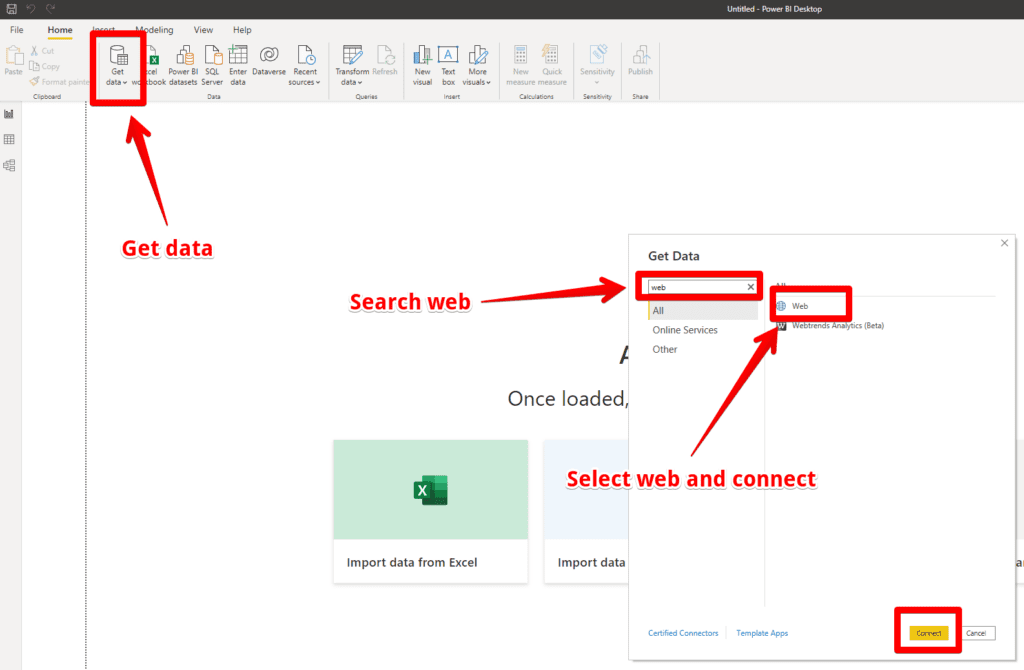
Next we are going to take a URL link that we’ve constructed and connect to it in Power BI. In your Power BI Desktop app, click Get data, and search for web in the search box. Select web and think select the Connect button.
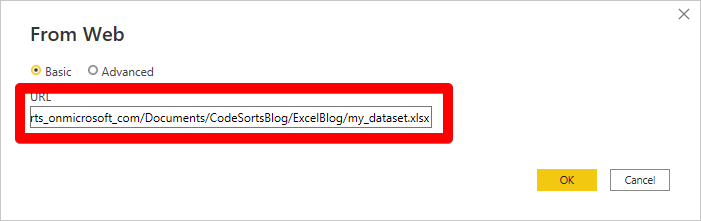
In the URL field, paste the Excel spreadsheet OneDrive URL and click OK.
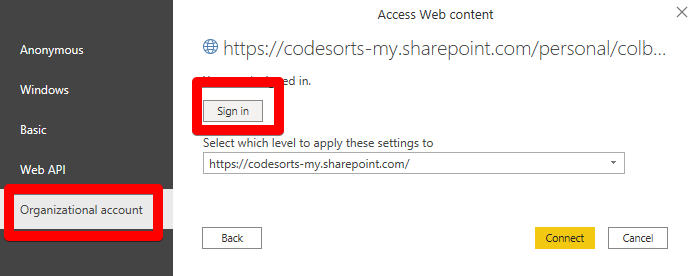
Unless you have previously saved credentials to the OneDrive link you will see a new window appear labeled “Access Web content”. Select Organizational account and click Sign in. Sign in with your OneDrive account. Once you have signed in, select Connect.
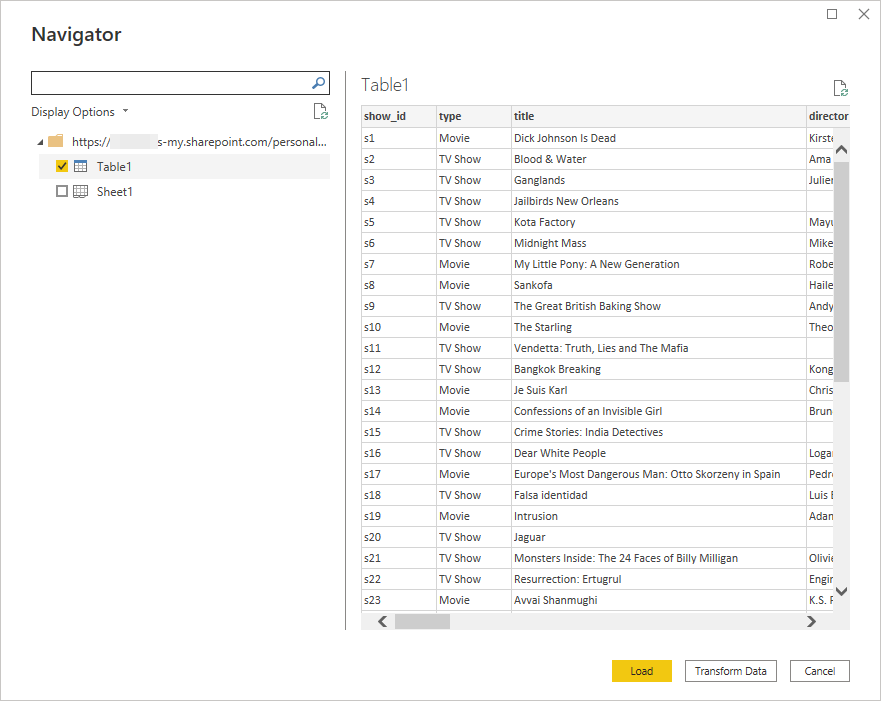
Once connected, a navigator window will appear. Depending on your data, you might see the option to select a table or sheet. There also might be multiple tables or sheets, which will match how you’ve setup your Excel spreadsheet. Select the check-mark beside the tables and/or sheets you wish to import into your report and select Load. I should mention that you can also select Transform Data which will allow you to make transformations against your tables/sheets during load.
Test Refreshing
Now it’s time to test refreshing your data into your dataset. Simple select the Refresh button under the Queries section in the Home ribbon.
So, now if you make any changes to your spreadsheet in OneDrive and hit refresh, your dataset should reflect those changes in your report.
So, what next?
Next step to finalize our report after we have built our report UI (I will leave that step to you) with our dataset is to publish those changes to Power BI’s online service. Simple hit Publish and select the workspace you wish to publish the report to.
So, that’s it?
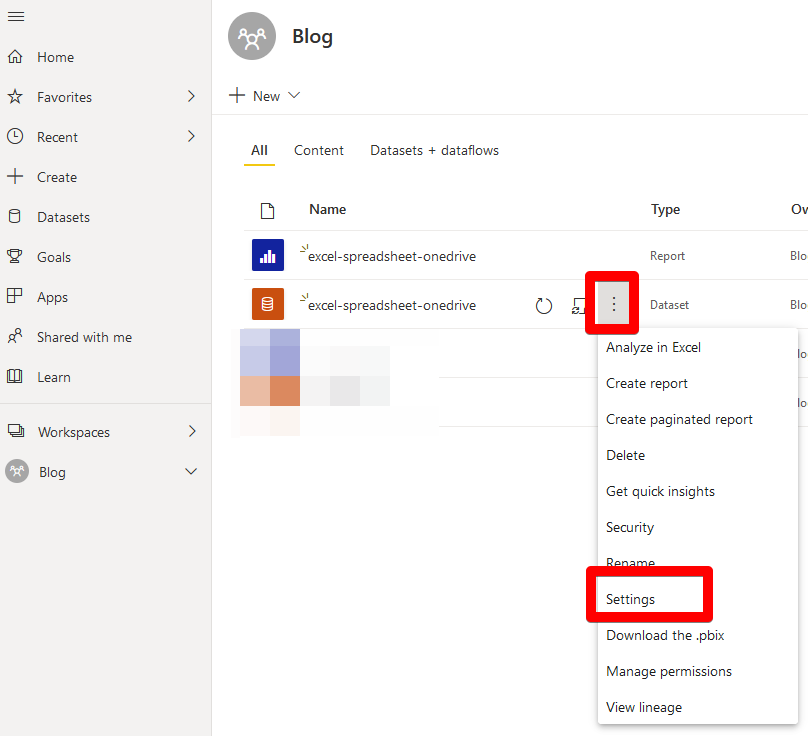
No quite. The last step we need to do is authenticate our connection in the Power BI online service. Navigate to https://app.powerbi.com and sign in with your Power BI account. Go to the workspace you published your report to. Hover over the dataset and select the more options menu and then select Settings.
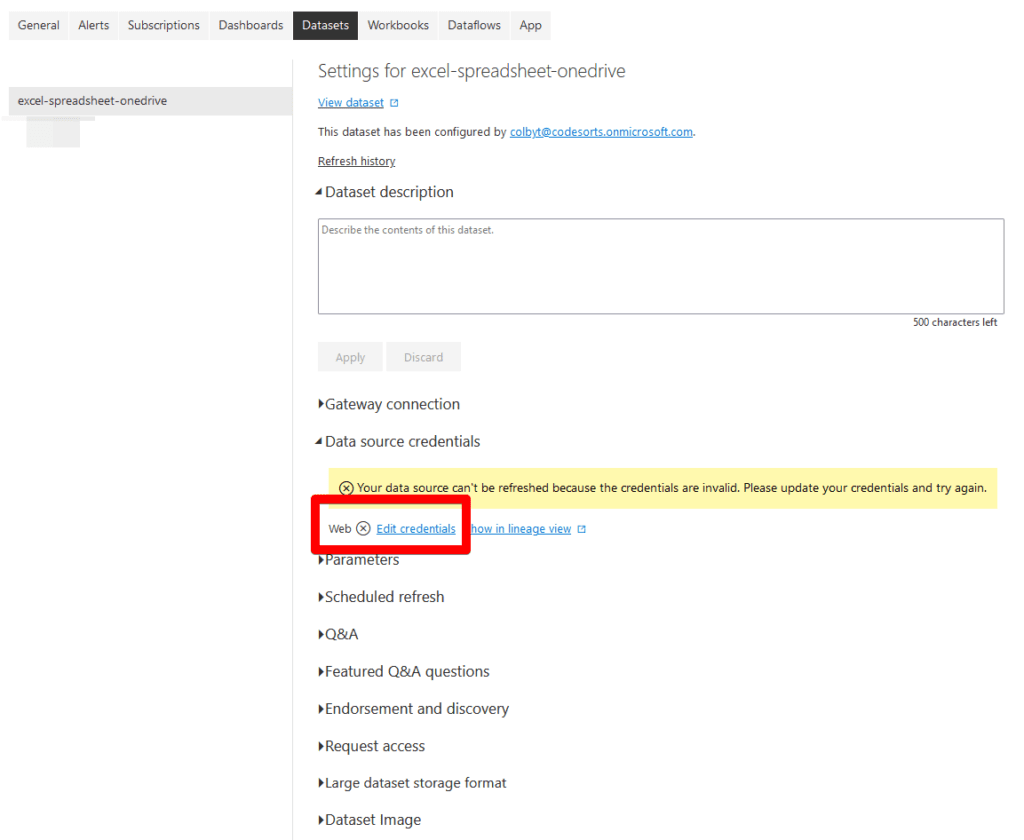
Select Edit credentials under the Data source credentials.
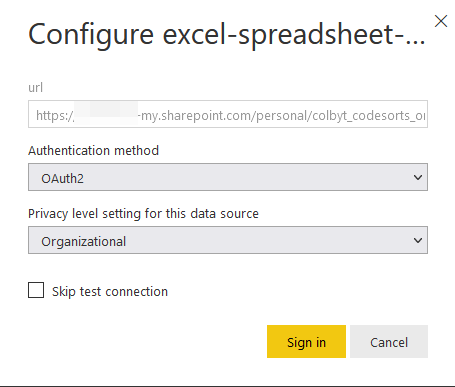
Select OAuth2 under Authentication Method and select the privacy level that applies to this data source. In my case I selected Organizational. Select Sign in.
Fin
And that’s it, you are now ready to either manually refresh your dataset in Power BI online or add a scheduled refresh to your dataset. So to review, we explored how to refresh an Excel spreadsheet that is stored in OneDrive. Remember it is only recommended to store a file in a personal OneDrive account if that account is a service account. Best practice is to avoid storing data in personal individual OneDrive accounts as these might be decommissioned in the future, depending on your M365 tenant policies.