It has been in the works for a while now, but finally Microsoft Teams breakout rooms are here! Lets take a quick look at how to use breakout rooms and how they can help you during a Teams meeting.
Get to know breakout rooms
Before this update, there wasn’t a nice way to be able to create breakout rooms for you Teams meetings. I previously created a video on a workaround using teams channels if you would like to check it out: breakout rooms workaround. Although this method works, it’s rather cumbersome.
On December 9th, Microsoft surprised us with the general availability of Teams breakout rooms. Finally! Finally we have the feature built directly in to our meetings. Goodbye channels and hello convenience. Before we jump into how to quickly and easily setup your own breakout rooms, lets touch on a few breakout room details.
The first thing you need to be aware of is currently only meeting organizers can create breakout rooms. So if you aren’t the organizer of the meeting, then this method will not work for you. The organizer also has to be using the Teams desktop client, sorry mobile and web! However, per official announcements participants in the meeting can use a desktop, mobile or web client when connecting to a breakout room. I didn’t test mobile, but my tests on web weren’t fruitful. Every time I tried to add a participant who were joining via the web client to the breakout room they would remain in the main room (no notifications either). Might be a browser issue (I’m using Firefox on Windows 10) or a bug in the system, I’m unsure.
Next point to be aware of is that currently only 50 breakout rooms can be created per meeting. This number should be more than adequate for most, but certainly something to keep-in-mind if you are hosting large scale meetings.
Lets get started!
Meet now or create a calendar invite
First thing you’ll want to do is launch your desktop Teams client. For the purpose of our overview, I’m going to go to Calendar in my app bar and hit Meet now. You can also create a new meeting in your calendar instead, both options work.

Create your breakout rooms
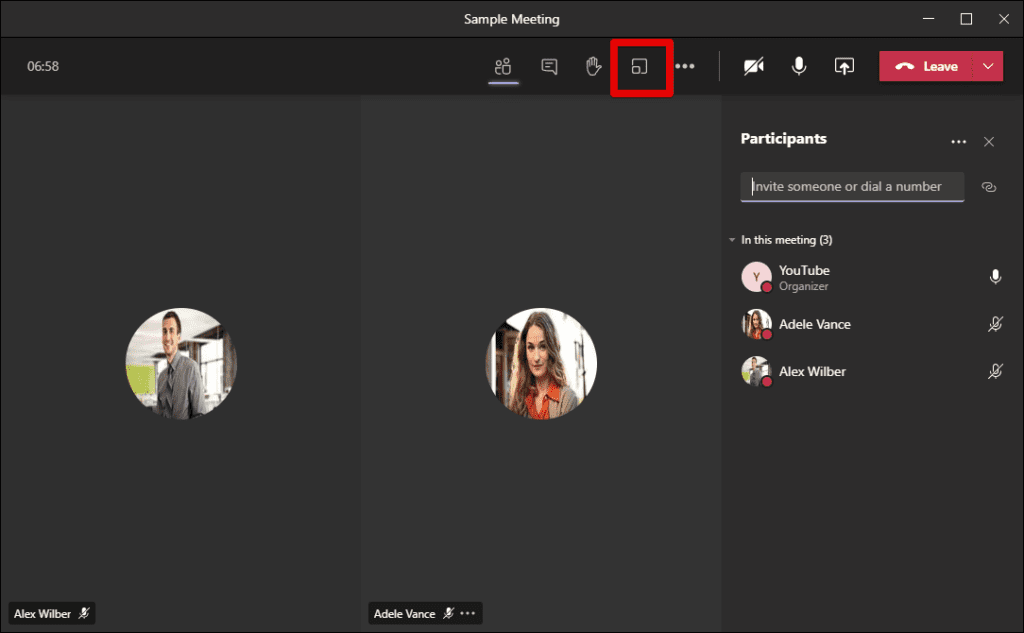
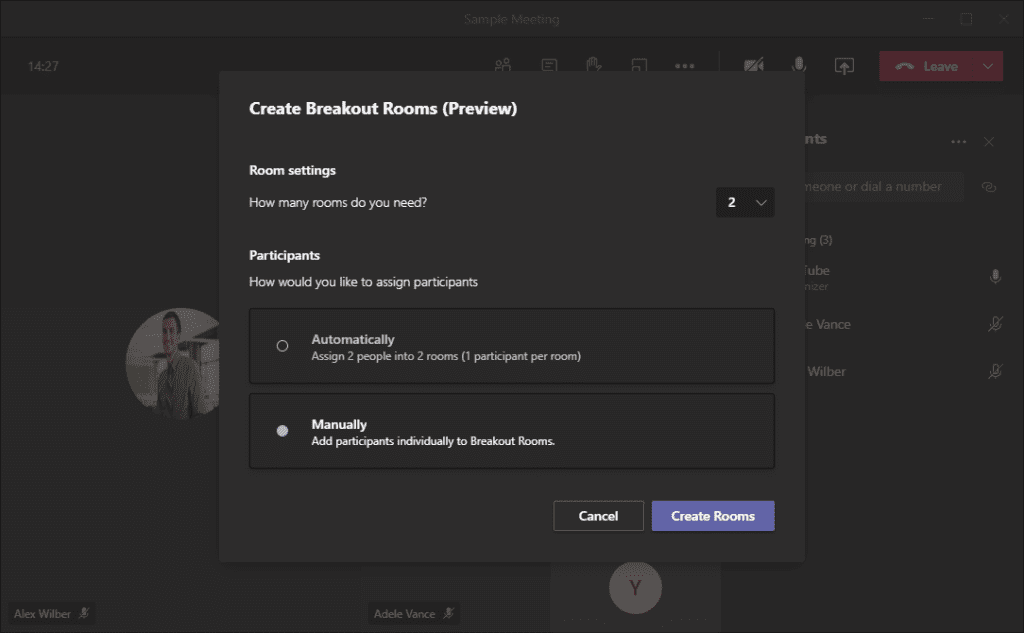
Once in the meeting, click on the breakouts room button on the top options bar, right of the raise hand button (Tip: if you ever get confused just hover over the buttons for their tool-tip names). Once you’ve clicked on breakout rooms, you will be presented with a small pop-op window with two options for participants and the number of rooms you need. For our example we are going to select the Manually option, so that we can assign our participants manually.
So you might be thinking to yourself, why would I need to manually assign participants to a room. Well, an example scenario might be that you’re a elementary school teacher and you are aware that there are certain students in the class that require a little bit more encouragement to do certain schoolwork tasks. If you used the automatic approach, you may risk placing two or more students together that might make the breakout rooms unproductive.
In my example I am selecting 2 rooms and then selecting Manually for my participants options. Click Create Rooms. It should take a few seconds for your rooms to be created, but once they are you should notice them appear on the right hand-side of your meeting window.
Assign participants and name rooms
From here, if you click on the Assign participants button, the list will expand and show you all the participants in your meeting. Before assigning participants, you might want to rename each room. To rename a room, hover over the room and click the more options button (the three dots beside the room) and select Rename room.
How do I add or remove rooms?
If you mistakenly added too many rooms or didn’t add enough, you have the option to delete a room (via the more options button) or add a room by clicking Add room.
Why are my rooms closed?
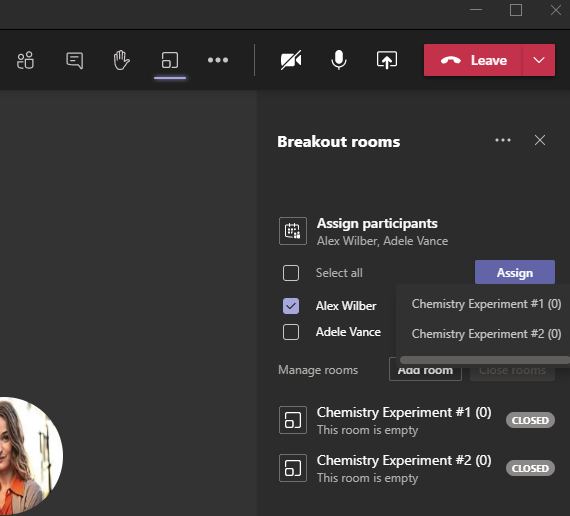
One thing to point out and you may have already noticed this, but before you assign participants to a room, the room will show up as closed. To open the room, you will first have to assign participants to it. Click on the Assign participants drop-down list again and select a participant (or more) and then select Assign. When you select assign, a drop-down menu will appear of your rooms. I’m going to assign Alex to “Chemistry Experiment #1” and Adele to “Chemistry Experiment #2”.
Room settings
Once you’ve added the participants to their respective breakout rooms, you’ll notice their names appear below the room names. You should also notice that the rooms are still marked as closed. To open all the rooms, all you have to do is select Start rooms. By default, the status of all the rooms switch to open. Before we do this however, I should point out that breakout rooms provide you some settings that you can modify. To access the breakout room settings, click on the more options (3 dots) beside the breakout room header and then select Rooms settings. These settings can only be set when your rooms are closed and will disabled when your rooms are open. Currently in breakout room settings you have two options as shown in the screenshot below. Automatically moving participants to rooms will add them to the rooms when you open the room without providing them the option to do so. The other setting, allows participants to come back to the main meeting while in the room. This allows participants to jump back and forth between their respective room and the main meeting.


Open all rooms
Since in my settings I have “automatically move participants to rooms”, when you open your rooms participants will automatically be added to their respective rooms. Below I’ve included some screenshots for both scenarios. The first scenario is what users will see if they are automatically moved to their room and the second scenario is if you don’t have the automatic move participants room setting enabled.
Note, in scenario 1, a banner will appear to alert the participant that they are being moved to their room in 10 seconds.

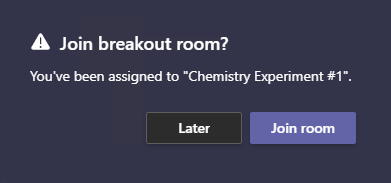
Below is what the participant will experience in scenario two. The participant has the option to join the room or do it later. If they say later they will have an option in the main meeting to Join room.
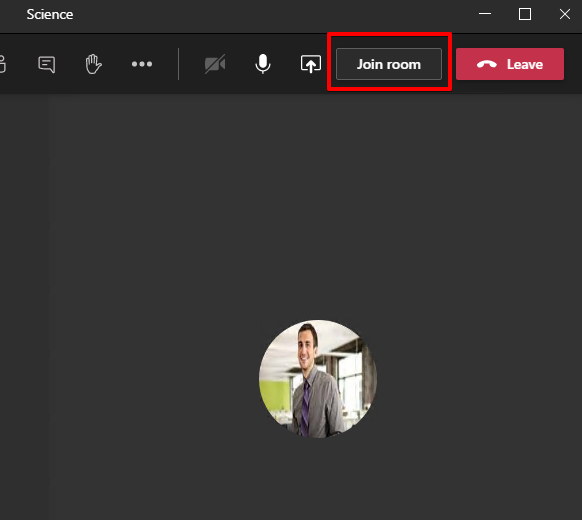
Join a room as the meeting organizer
As the meeting organizer you can jump from room-to-room to ensure your breakout rooms are running smoothly.
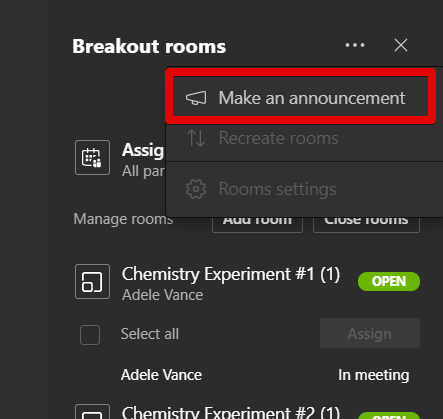
Make room announcements
In breakout rooms you also have the ability to make announcements for all breakout room participants. The announcement appears in the chat of each room, marked as an important message.

Close rooms
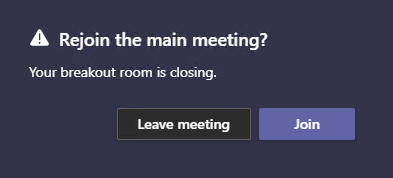
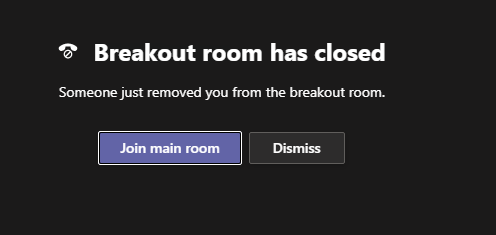
Finally, once you are ready to finish using the breakout rooms, simply hit Close rooms. Participants will only be moved back to the main room automatically only if you have the “automatically move participants to rooms” setting enabled. Otherwise, participants will be presented with a dialog to leave or join the main meeting. If the participant doesn’t click the options in the rejoin meeting popup after a number of seconds (~10 seconds) their room window will change to closed, offering them the option to join the main room with the Join main room button.
That’s all folks
Thanks for reading along! Hopefully this article gave you a brief overview of Microsoft Teams breakout rooms and the different options it presents. I’m sure in the near future we will see further improvements and additions to breakout rooms. Currently the only thing I’ve been able to see on the roadmap in regards to breakout rooms is Support for breakout rooms for Microsoft Teams Rooms on Android.
Leave a comment below if you have any questions and I’ll do my best to answer them. Cheers!