Overview
This month marks the 3 year anniversary of Microsoft Teams. Teams is Microsoft’s team collaboration software that is part of the Office 365 service. Teams is a Slack competitor and is the evolution of Microsoft Skype for Business. Teams provides businesses a way for their employees to collaborate on projects and documents easily and is currently supported on most major operating systems, which include: iOS, Android, Windows, macOS, Linux, and a web client.
Features
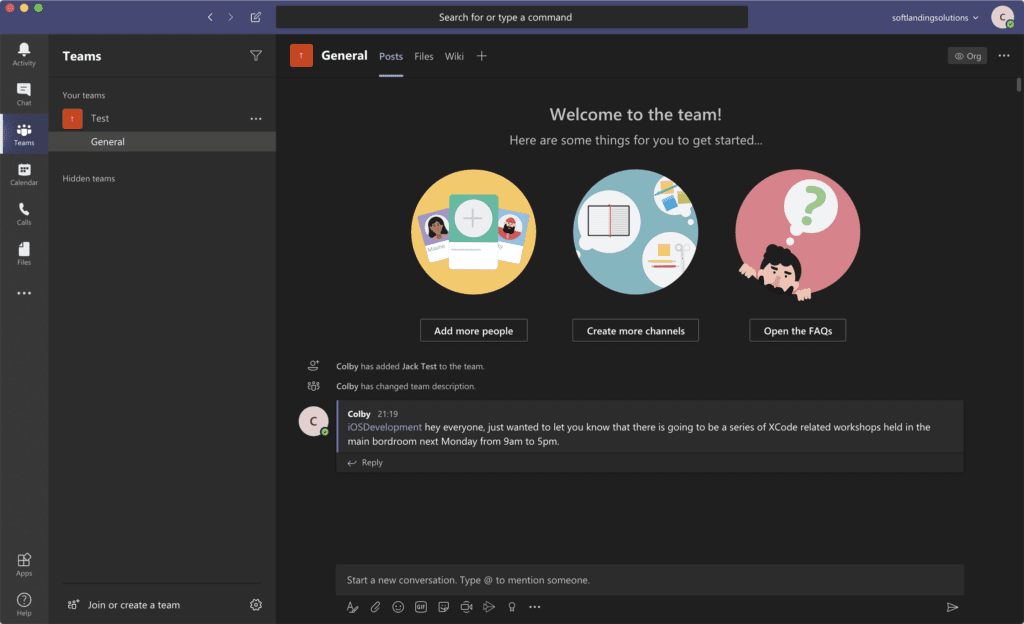
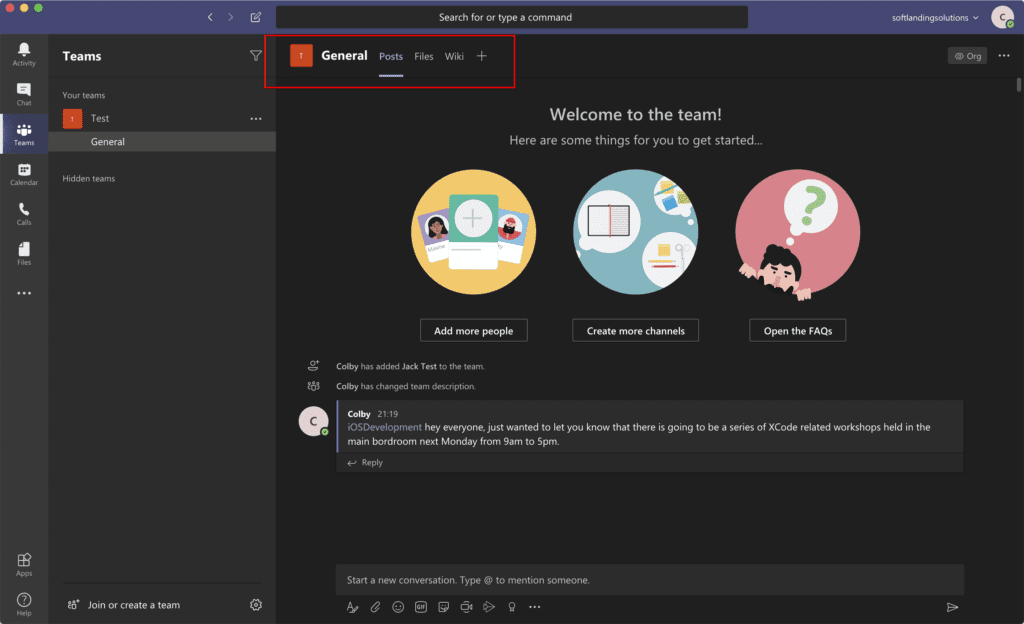
Starting up Teams for the first time, you will be presented with a sign in authentication dialog, which if you have signed into any of Microsoft’s other products, should feel familiar. Once authenticated, your window should look something like the desktop screenshot below.
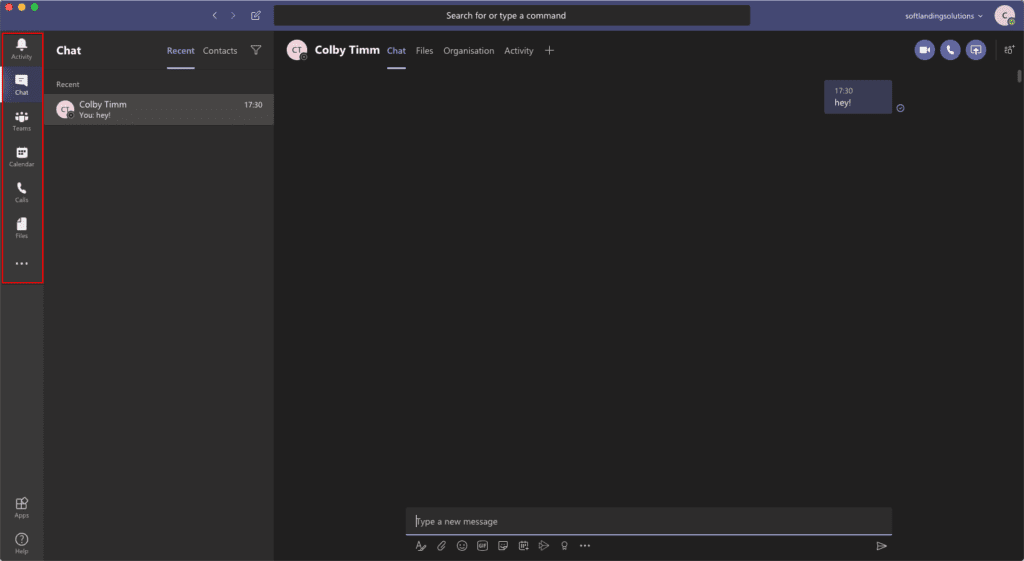
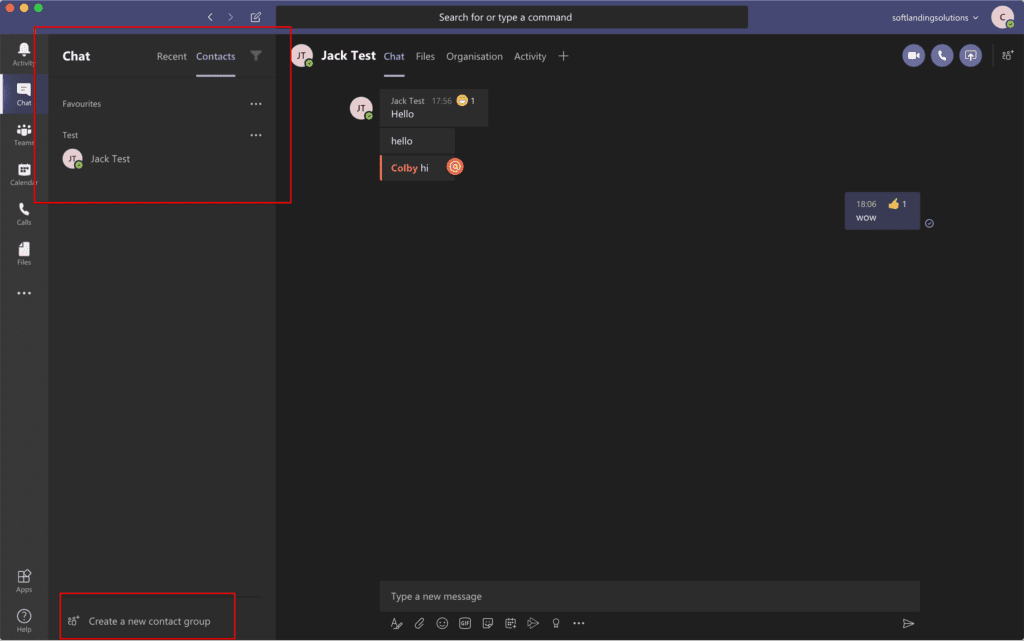
Teams is broken up into sections, with a navigation bar on the far left-hand corner, which I’ve highlighted in the screenshot.
Below I’ve provided a brief synopses of each of the navigation fields.
Activity – Think of this as your notification centre, where your notification activities will appear when someone mentions you (@your.name.here) or likes your post etc.
Chat – This is where all your instant message chats will appear. Chats can be single one-on-one chats with individuals or group chats
Teams – This is the main collaboration area of Teams, where you have will access Teams that you have been added to. Depending on your organization, teams could be client/internal projects, company groups (e.g. Developers, Sales, Admin, etc.), or clients. The world is your oyster when it comes to how you define what a team is.
Calendar – This is your O365 calendar. This is essentially the same type of calendar you would see when you use the calendar view in the Outlook app.
Calls – This is where you can make VOIP calls. Depending on the way you have configured Teams, you can make Teams to Teams calls or make “regular” calls.
Files – This is the area that will list all your recent OneDrive/cloud files, and files that people might have shared with you via a chat or via your O365 account
The Three Dots – Where you can add installed Teams’ apps to your navigation bar
At the bottom of the navigation bar is the Apps and Help area. The Apps are is where you can install Teams compatible apps and the Help area is where you can gain more insight into how to use Microsoft Teams.
Activity Feed
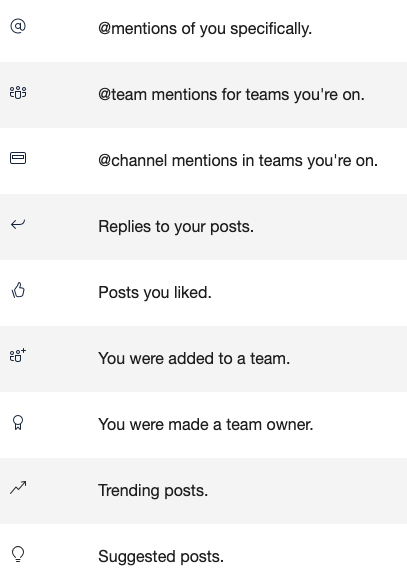
The Activity feed area will show a summary of all notifications that pertain to you. Below is an image that summarizes the unique symbols you will come across when perusing your activity feed.
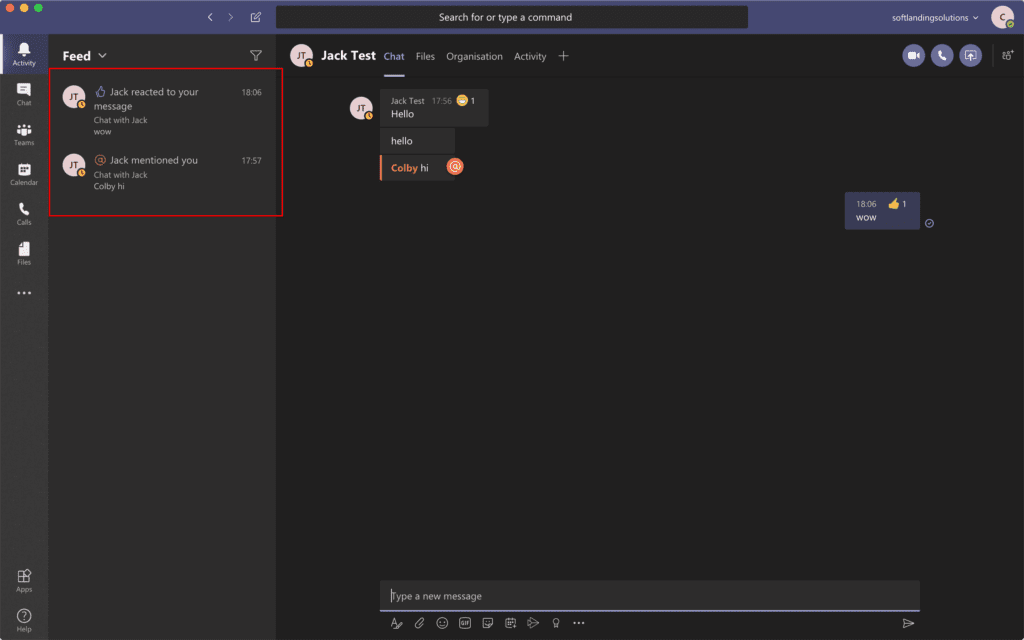
If you mention someone (using the @ symbol with the individuals name), the individual will be notified and a notification will appear in their activity feed as shown in the screenshot below. You can also see in the screenshot that the user Jack Test liked my reply, which also appears in the feed.
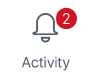
You will also notice that when you receive a notification in the Activity feed that a red circle with the amount of activities will appear on top of your Activity button in the navigation bar.
Chat
The chat area is where you will have access to any direct messages between you and an individual or group. To create a new chat, click on the new chat icon (as shown below) in the top portion of the chat area, just left of the search bar.

Once you’ve clicked on the new chat button, it will automatically direct your cursor to select the “to” field where you can type the name of the individual or group in your organization’s Active Directory (AD) tenant. Note that you can also add someone who is outside your tenant by typing in their Teams affiliated email. When you add them, they will have a “External” designation beside their name, to make you aware that this individual is “outside” your tenant/organization.
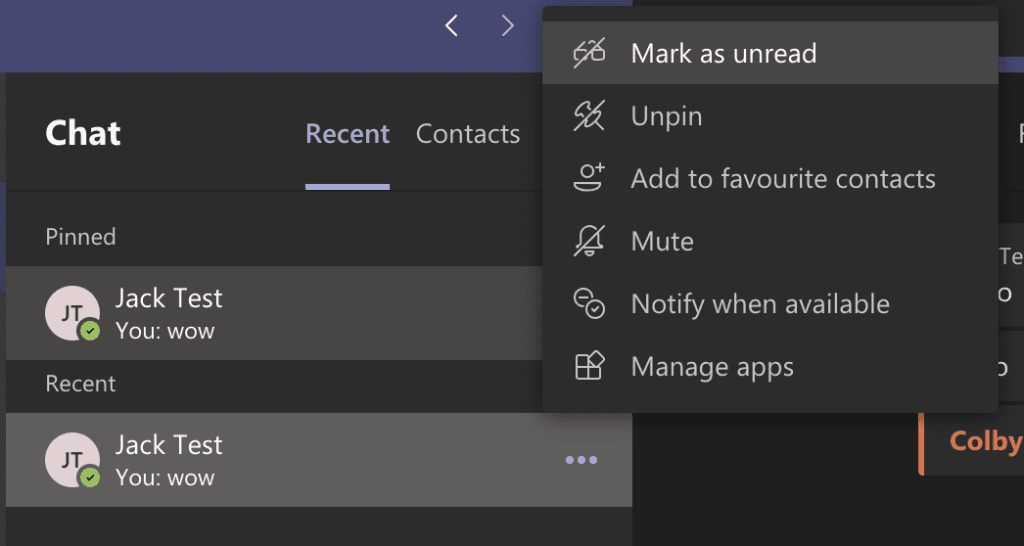
In the Teams chat pane, if you select “Contacts”, you can see all the contacts that you’ve added to your favourites. To add someone to your favourites, hover over the person/group chat, select the three dots and select “Add to favourite contacts”. You can also “Pin” a contact, which will make them appear at the top of the “Recent” area.
In the Contacts area, you can select the “Create a new contact group” and provide it a name of choice (Test in my example) and then select the three dot menu beside the group to add a contact to the group. The three dot menu also provides you the option to rename or delete the group. One thing to note is this group isn’t an O365 group and so won’t appear in the new chat “to” field. The best way to think of chat groups is that they are simply a method of organizing your contacts into groups to make it easier to find/sort people.
Teams
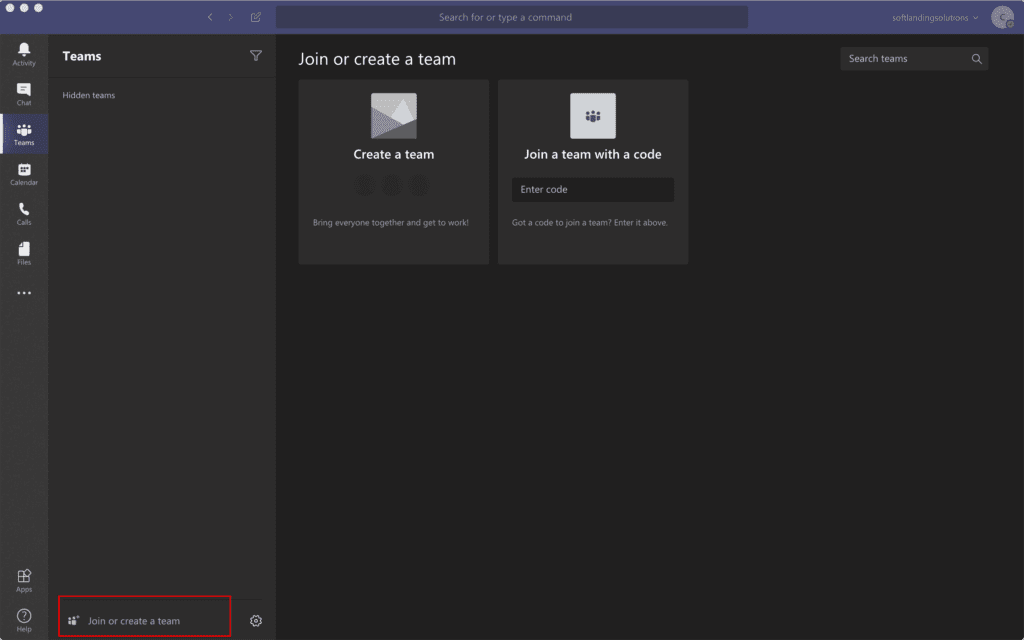
The Teams area is where you will access all the teams you have been added to, which are simply groups of people that have to get something done in your organization. Teams can be broad (so organization wide) or more focused, such as your sales or marketing team. To create a team, simply click the “Join or create a team” in the bottom left of the Teams area, as shown in the screenshot below.
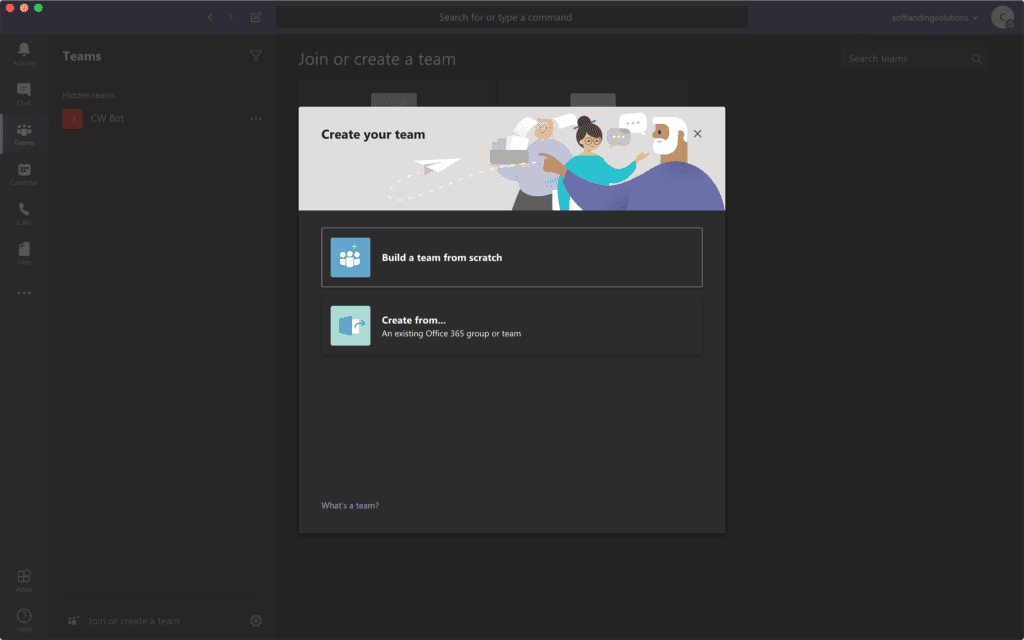
You can then create a team from scratch, join existing public teams, or join a team with a code. Note that when you create a team, an O365 group will be generated. You can either create a team from scratch or create a team from an existing O365 group or team. What’s great about creating a team from an existing O365 group is that the users in that group will automatically be added to the team, without you having to add them manually.
If you create a team from an existing team, all the apps, settings and channels in the team will be copied over to the new team. You can modify what gets copied over, with the option of selecting if you want to copy over channels, tabs, team settings, apps, and members. For instance, if you just want to copy over the members, you can just select the members and uncheck the other content. Note that if you decide to copy the tabs from an existing team, you will be required to copy over the channels. Also, when you copy an existing team, the message, files and content won’t be copied. You will also be required to set up tabs and connectors again.
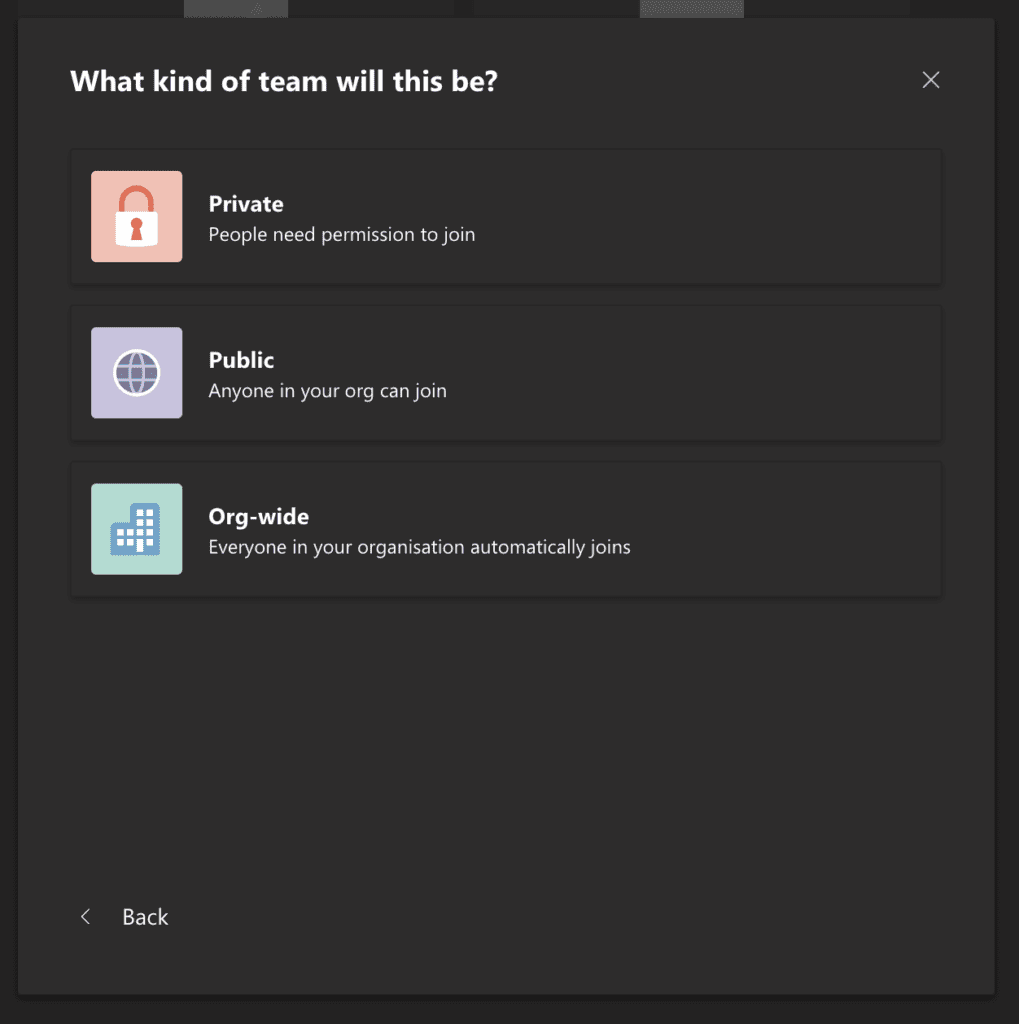
If you create a team from scratch, you will be required to select one of three options: private, public or org-wide. If you select org-wide, everyone in your organization will be automatically added to the team. The major difference between private and public teams is that for someone to join a private team they require permission or have to be added to the team, whereas with public teams, anyone in your organization just simply has to search the team to join and manually join it.
Once you’ve created your team, you will notice that you will get a group under your team called “General”. This group is called a channel and allows you to further break down your team.
Settings
If you hover over the newly created team, you will be provided with a variety of options in the menu. This menu will differ depending if you are an owner or a member of the team. Below I’ve taken screenshots of an menu options for an owner (left) and a member (right).
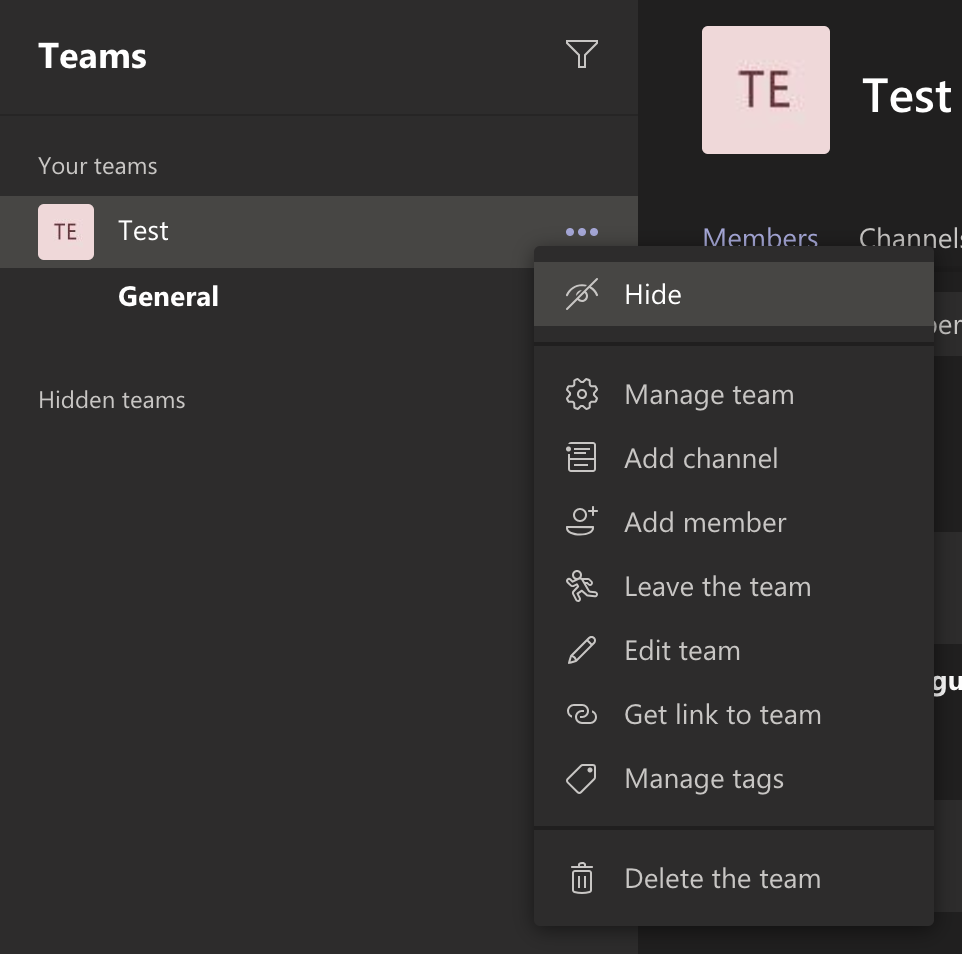
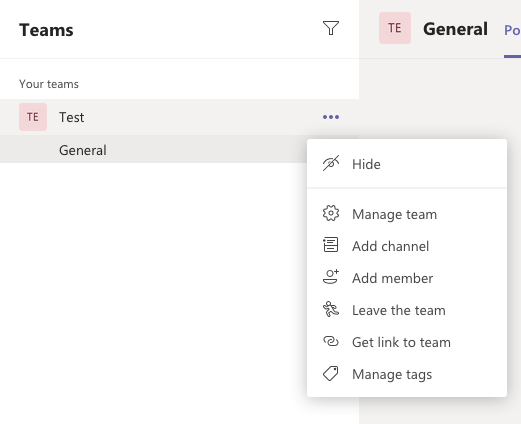
The major difference between the owner and member user is that members by default do not have the ability to edit the team and delete the team. The “Manage team” menu item allows the team owner to determine how they want to govern the team. From an org wide view, you can manage your Teams tenant via https://admin.teams.microsoft.com. I plan to go into the features of the Teams Admin portal in another blog article in more detail. For the sake of this blog, we will point out some really cool features of a team.
Tags
Tags provide you the ability to notify a group of people using a @mention. So as an example, lets say that the company Contoso Solutions wants to be able to notify its iOS developers about some new XCode development workshops coming up. What we could do is add all our iOS developers to a tag call @iOSDevelopment and then simple @mention them in any team channel.
Channels
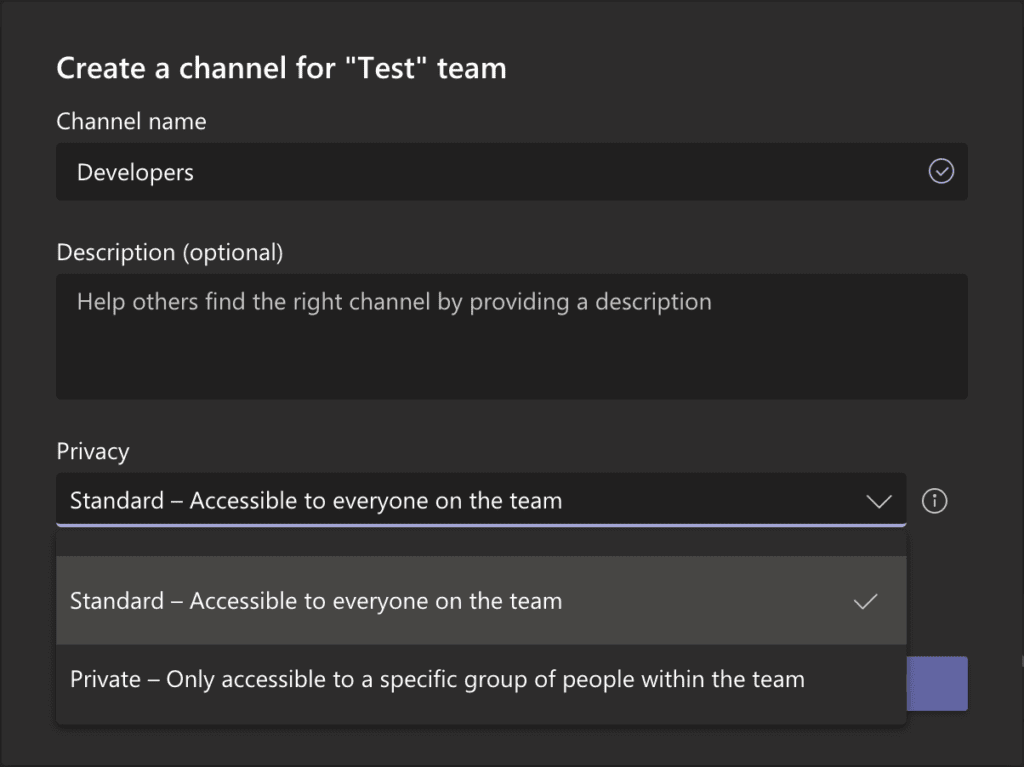
To create a new channel, click on the three dots beside your team and select “Add channel”. When you create a channel, you have the option to name the channel, add an optional description, set the privacy, and decide if you want to automatically show the channel in everyone’s channel list. For privacy, you have the option of keeping the channel standard, meaning anyone can access the channel, or private, which means it can only be accessed by a specific group of people.
For channel customization, you have the option of making posts to a channel, add files to the channel, create a wiki page, and add tabs which can be apps, links to a OneNote, Power BI, SharePoint, and a variety of other tab options.
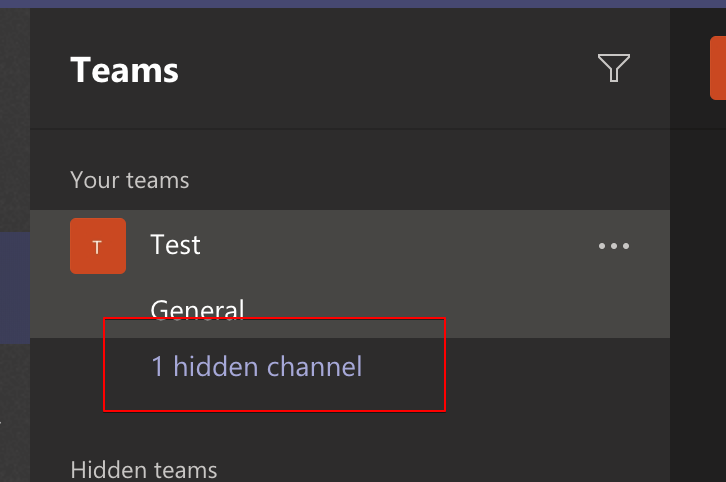
For channels, you also have the option to hide teams that might not pertain to you. To hide a team, simply select the three dots when you hover over the channel you would like to hide and select “Hide”. Once hidden, your hidden channels will appear in a hidden group.
Teams Management
Without going into too much detail about the management options for teams, hover over your team and click the three dots menu and select “Manage team”.
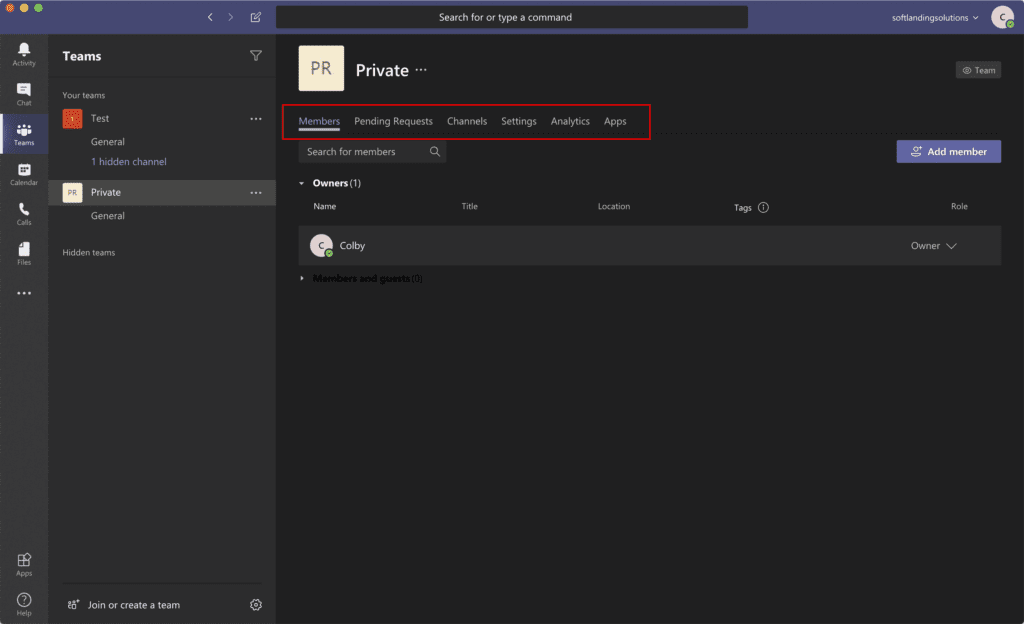
In the manage team page, you have the option of reviewing members of the team (you can add or remove them here), pending requests (for private teams only), channels (you can add or remove here), settings, analytics, and apps. In the settings tab, you can edit member permissions, guest permissions, fun stuff (such as allowing gifs, stickers and memes), and tag permissions. One important note to point out, if you want to generate a team code to provide to individuals who would like to join your team (useful for private teams), you can do that in the settings tab under team code. Note that guests will not be able to join with a team code. Team codes can also be reset or removed here.
Calendar
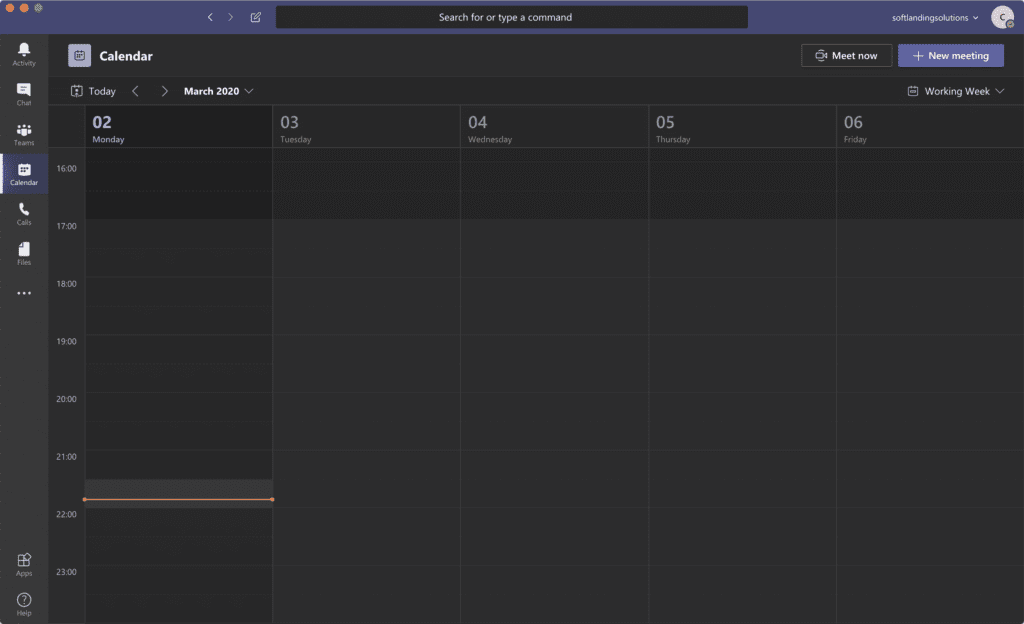
In the calendar area, you can view your current O365 calendar as well as create a meeting for a future date or for now.
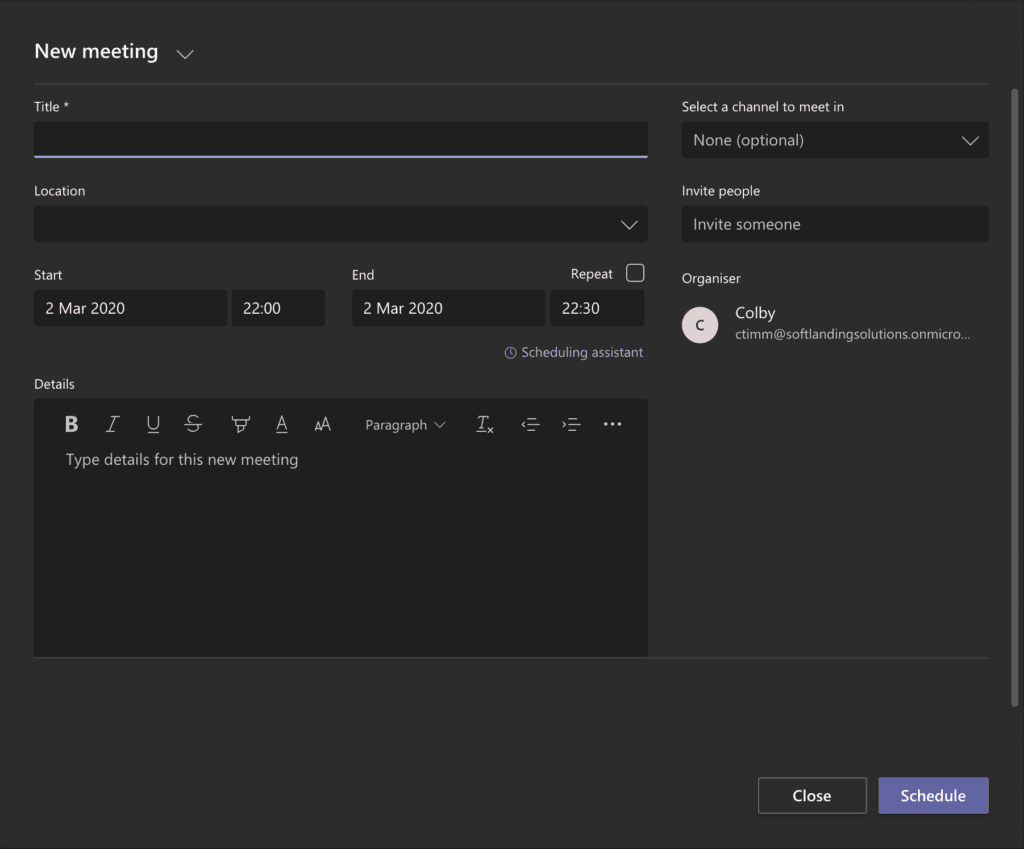
For creating a new meeting, you have to create a meeting title, add a location (optional and not necessary for Teams only meetings), a start and end date time, details, a channel to meet in (optional), and invite people (people who will be joining your meeting).
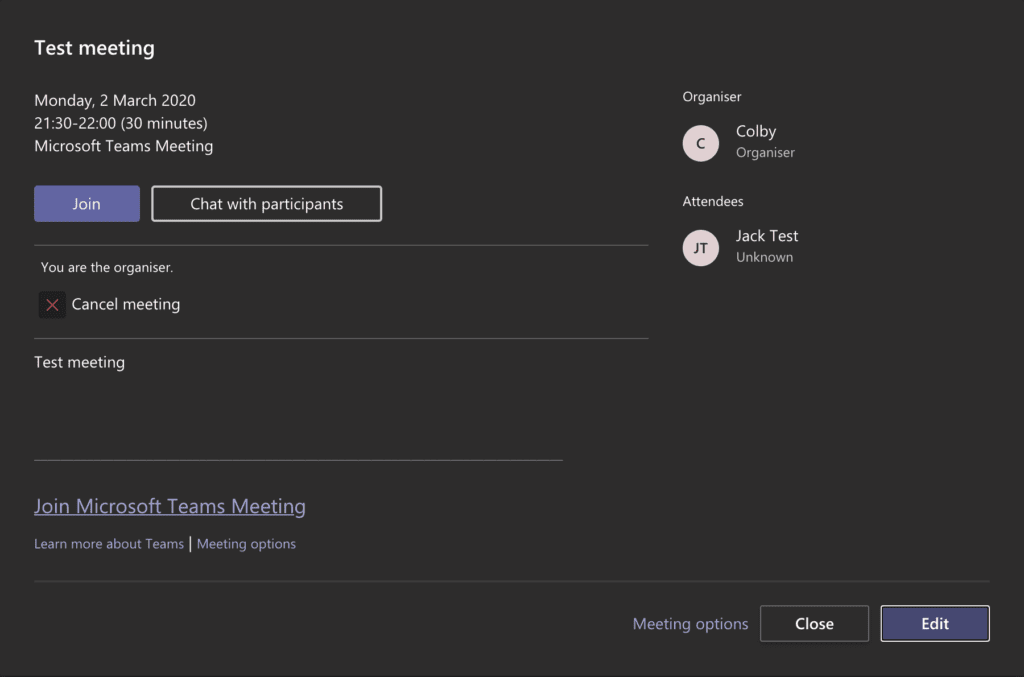
Once the meeting is created, it should appear in your calendar. If you click on the newly created meeting, you should see something similar to the screenshot below. As the organizer, you have the option to cancel the meeting, edit it to make updates, chat via IM to the participants, or join the meeting.
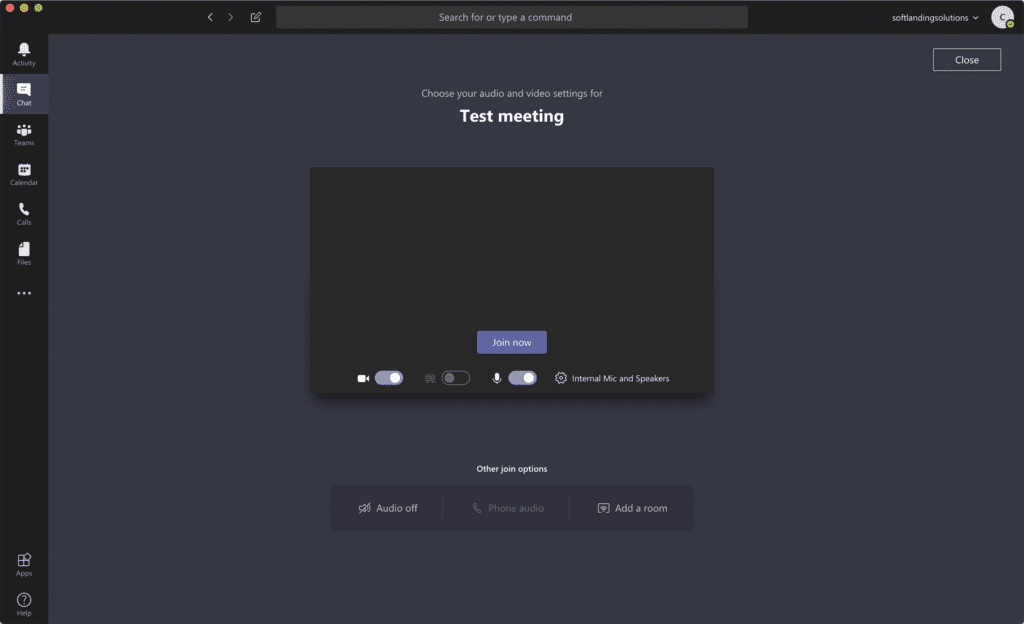
When you join a meeting, you can decide to enable or disable your webcam, camera blur (blurs your background), and mic. If you are experiencing issues with your computer not selecting the correct microphone, webcam or speaker, then navigate to the settings wheel beside the mic toggle labeled “Internal Mic and Speakers”. In the device settings, you can change your microphone, speaker, and webcam as well as make a test call (similar to the test call in Skype) to test your microphone and speakers.
Calls
The calls area is where you can access your contacts, add contacts or groups to speed dial, view your call history and access your voicemail. One really cool feature of voicemail in Teams is that it will provide you will transcripts of the voicemail message.
Files
The files area showcases your recently accessed files, files shared with you in Teams, any files you may have downloaded via Teams and your cloud storage. By default, you should be able to see your OneDrive storage here. Teams also provides you the option of adding other cloud storages such as Dropbox, Box, ShareFile and Google Drive.
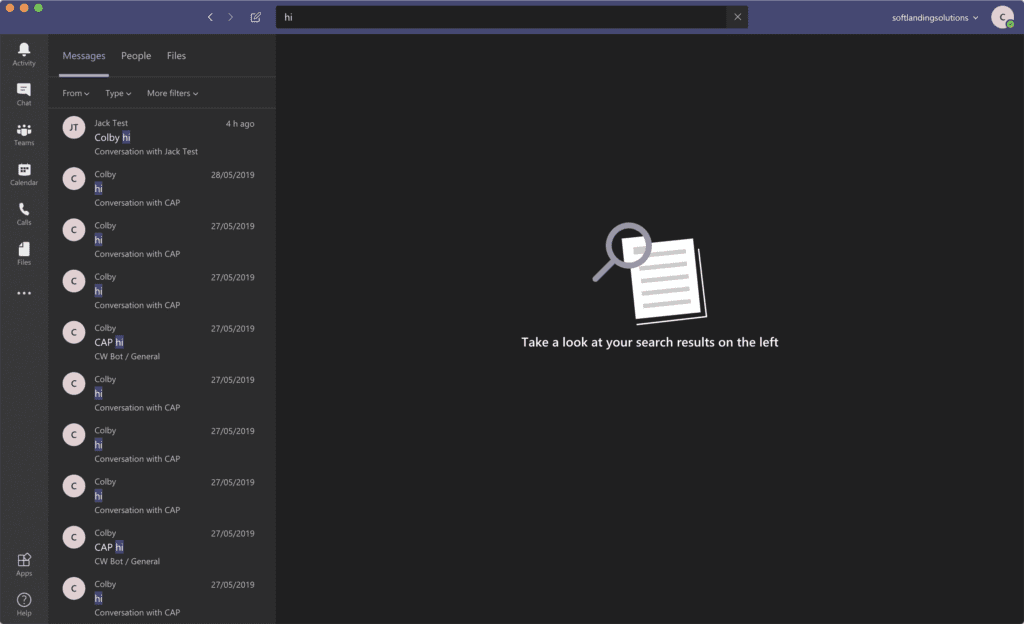
Search
The final feature that I would like to mention is the search bar in the top middle of the Teams app window. If you have a person, file or message that you would like to find, all you need to do is simply search the keyword(s) in the search bar and hit return on your keyboard. Once you’ve search your keyword(s), you have the option of filtering your search options more (mostly in the messages section) where you can select who the message is from, type of message (chat or channel) and more filters (e.g. subject, date range, team (selected from a dropdown list), channel (if a team is selected), my @mentions and has attachment.
Conclusion
In closing, Microsoft Teams offers your team a lot of amazing utilities to help boost productivity and collaboration. By allowing team members the opportunity to communicate via instant message (chat) or collaborate in a team setting with its various options for channels, organizations are able to collaborate more effectively, especially when a lot of organizations today have employees working remotely or internationally. Not only does Microsoft Teams provide opportunity for internal users, it also allows you the ability to interact with clients or other business personnel outside your organization.
If you are interested in giving Teams a try, I recommend signing up, its free!
Nicely done on listing and describing a lot of the key features. You did a good job covering it. A suggestion though, for screen shots, perhaps consider not using dark mode as they images are a bit challenging to read.
Thanks Brian for the feedback and taking the time to read the post! Will definitely keep that in mind next time.